Author: Bartholomew Alen
How much does a grow tent setup really cost? The honest answer does not begin with the light, but with the available space. The tent, LED, exhaust system, activated carbon filter, air circulation, pots, measuring equipment, and ongoing electricity costs all need to work together. This guide provides a complete beginner setup checklist, realistic budget levels, and the areas where cutting costs too aggressively can become especially expensive later.
The short answer
A small, functional indoor setup can start at roughly €350–€600. A balanced 80 × 80 or 100 × 100 cm system will often fall closer to €650–€1,200. High-performance, quiet, and well-automated systems can cost considerably more.
These figures are planning ranges, not current shop prices. Size, lighting quality, exhaust capacity, sensors, and automation can significantly change the final cost.
1. What grow tent size is right for you?
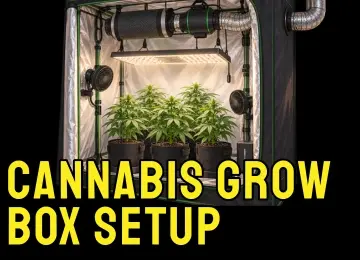
The floor area determines almost every other component. A larger tent requires more light, more airflow, and usually increases the cost of growing media, pots, climate control, and electricity. Do not buy a light first and then search for a tent that fits it. Start by defining the location, external dimensions, available room height, and working space.
Scroll horizontally to view the table
| Tent size |
Typical LED range |
Character |
Approximate total cost |
| 60 × 60 cm |
100–150 W |
Compact, easier entry point |
€350–€650 |
| 80 × 80 cm |
150–250 W |
Good compromise |
€500–€900 |
| 100 × 100 cm |
250–400 W |
More space and reserve capacity |
€700–€1,300 |
| 120 × 120 cm |
450–650 W |
Higher climate and exhaust requirements |
€900–€1,800 |
Wattage ranges are only starting points. Light distribution, efficiency, dimming capability, and distance from the plants are more important. The fundamentals are explained in our guide to PPFD, DLI and LED distance.
View grow tents

Growbox M Set 80 × 80 cm with 150W LED
A compact entry point for limited spaces. Before purchasing, check the complete package contents and budget separately for measuring equipment, pots, and consumables.
View product

Cultibox 100 Set with 400W LED
The 100 × 100 cm class offers substantially more space but also requires a suitable location, stronger exhaust ventilation, and more careful electricity-cost planning.
View product

AC Infinity Advanced WiFi Tent Set 90 × 90 cm
An option for users who want to plan control and future expansion from the beginning. Automation becomes most valuable when thresholds, sensor positions, and control targets are properly understood.
View product
2. LED lighting: the largest single expense
The LED does not determine success on its own, but it has a major impact on purchase cost, electricity consumption, and heat load. Do not focus only on wattage. A good grow LED provides reasonably even light distribution across the entire growing area, is dimmable, physically matches the tent, and comes with transparent manufacturer data.
More light is not a free upgrade. Without suitable climate, water, and nutrient management, excessive intensity can increase plant stress. For positioning basics, see our LED distance guide.

Green Force LED Bar 53W
A narrow LED bar can be useful for propagation, supplementary lighting, or a separate young-plant area. In a larger flowering tent, it does not replace a properly sized primary grow light.
View product

HortiLight Litha S 150W
The 150-watt class is suited to compact areas. Compare the real dimensions and PPFD distribution with your tent, and start young plants at reduced power.
View product

SANlight EVO Set 80 × 80 cm with 265W
A higher-powered option for an 80 × 80 cm area. Dimming and measurement are especially important because young plants require substantially less light intensity than a fully developed flowering canopy.
View product
View all LED grow lights
3. Exhaust ventilation, activated carbon filtration, and air circulation
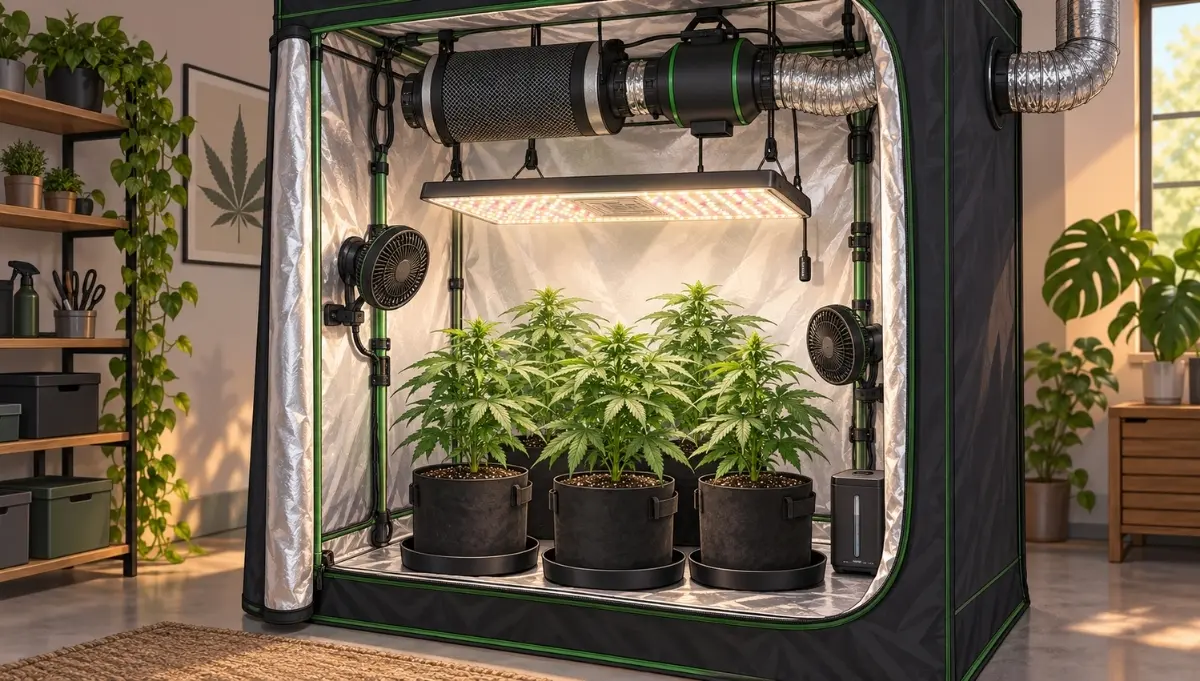
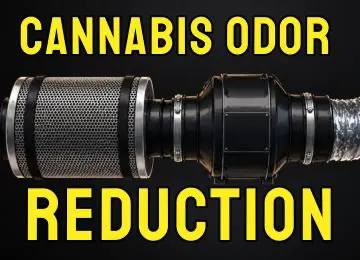
Exhaust ventilation removes heat and humidity from the tent. The activated carbon filter should be matched to the real airflow. A filter that is too small restricts the system. A larger filter can provide useful reserve capacity, provided that connection diameter, airflow, available space, weight, and fan performance are compatible. Long duct runs, tight bends, and silencers reduce real airflow.
Air circulation does not replace exhaust ventilation. It moves air inside the tent and helps reduce stagnant, humid pockets between leaves. Do not direct a fan at maximum speed at the same plant top continuously. Dense canopies require particular attention; our guide to identifying and preventing mold covers important warning signs.
Plan for quiet operation instead of improvising later
A larger inline fan running at reduced speed can often be quieter and more comfortable than a smaller fan operating at maximum output. Plan the mounting points, duct route, and filter position before assembly. Space above the LED is often limited.
View ventilation kits
4. Complete beginner setup checklist
Scroll horizontally to view the table
| Component |
Needed for this setup? |
Budget range |
Main thing to check |
| Grow tent |
Yes |
€70–€250 |
Dimensions, height, stability |
| LED |
Yes |
€100–€700 |
PPFD distribution and dimming |
| Exhaust and filter |
Yes |
€100–€350 |
Real airflow and noise |
| Circulation fan |
Strongly recommended |
€20–€80 |
Gentle, broad air movement |
| Timer or controller |
Yes |
€10–€100 |
Switching load and reliability |
| Thermo-hygrometer |
Yes |
€15–€60 |
Min/max memory and sensor position |
| Pots and saucers |
Yes |
€20–€100 |
Drainage and final volume |
| pH and EC measurement |
Depends on the medium |
€20–€250 |
Calibration, storage and maintenance |
| Heating, humidification or dehumidification |
Only after measuring |
€30–€300+ |
Actual climate requirement |
5. How much does electricity cost?
Monthly electricity cost is easy to calculate: power in kilowatts × operating hours per day × days per month × electricity price. A 240-watt LED running 18 hours per day for 30 days uses approximately 129.6 kWh per month. At an example electricity price of €0.30 per kWh, that would be €38.88 for the light alone.
Do not forget the additional equipment
Exhaust and circulation fans often operate for longer than the lights. Heating, dehumidifiers, or air conditioning can increase electricity use dramatically. Calculate each device separately using its real power draw and your actual electricity tariff.
Scroll horizontally to view the table
| LED |
12 h/day |
18 h/day |
Example cost at €0.30/kWh and 18 h |
| 150 W |
54.0 kWh |
81.0 kWh |
€24.30 |
| 240 W |
86.4 kWh |
129.6 kWh |
€38.88 |
| 300 W |
108.0 kWh |
162.0 kWh |
€48.60 |
| 480 W |
172.8 kWh |
259.2 kWh |
€77.76 |
| 600 W |
216.0 kWh |
324.0 kWh |
€97.20 |
Check the electrical load in advance
The LED, exhaust fan, circulation fans, heating, dehumidifier, and other equipment can create a much higher continuous electrical load together than the light alone. Do not overload power strips or connect multiple power strips in series. Check device power consumption, switching capacity, and manufacturer instructions before use, and keep electrical connections away from water and wet floors.
6. Measure the climate before buying climate-control equipment
A humidifier is not automatically necessary, and a heater may be completely unnecessary in a warm room. First measure temperature and relative humidity with the lights on and during the dark period. Then assess those readings in relation to VPD for vegetative growth and flowering.

Neptune Hydroponics Heating Mat 32W
A heating mat is intended for cold propagation or root-zone areas and is not a universal requirement. Use it in a controlled way and measure the actual root-zone temperature.
View product
7. Pots, growing media, and watering
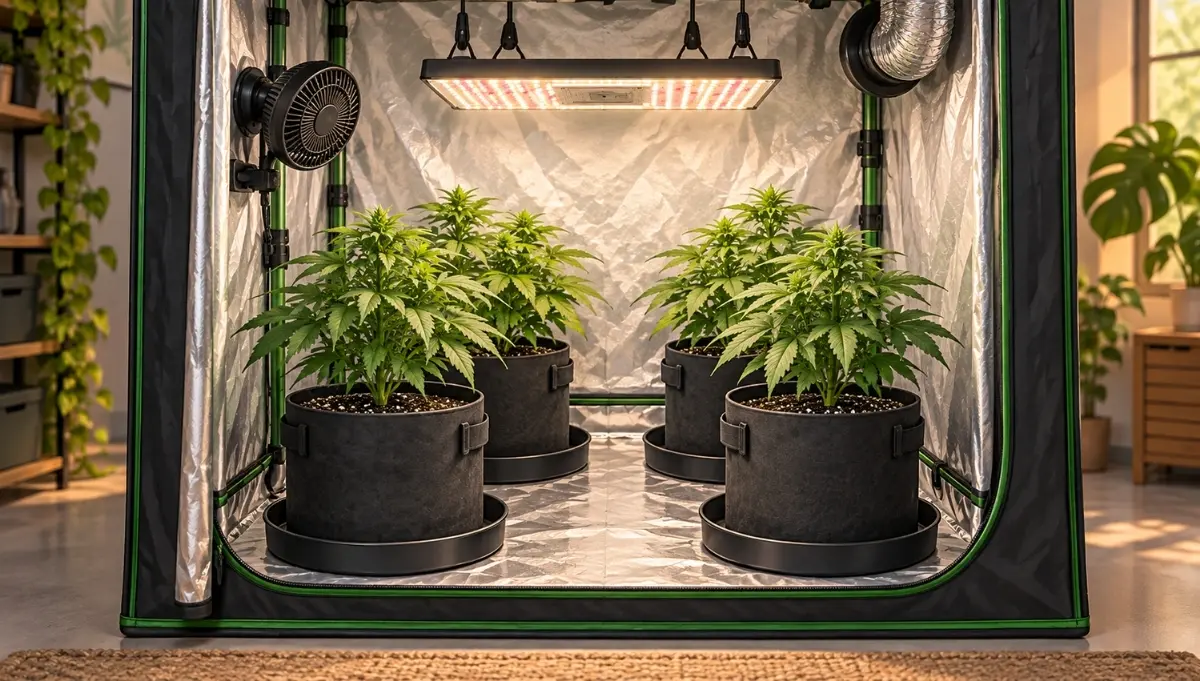
Final pot size needs to match the grow tent, plant count, and vegetative period. Too many large pots restrict airflow and reduce working space. Containers that are too small can dry out quickly and limit available root volume. For the early stages, see our guide to starting seedlings in Jiffy pots.
Soil is more forgiving for many beginners. Coco usually requires more frequent irrigation and more precise nutrient-solution management. Read more in our guide to coco growing media. Regardless of the medium, our watering guide can help prevent many common beginner mistakes.

Eazy Plug Pyramid 4.8 L
A propagation block can help structure the transition from a young plant into a larger root volume. Watering volume and nutrient strength still need to remain appropriate for the plant's size and development.
View product

Biobizz Light-Mix
A lightly pre-fertilized soil mix gives beginners more control over later nutrient additions than heavily fertilized mixes. Watering rhythm, pot size, and plant condition still remain critical.
View product

Plagron Cocos Premium 50 L
Pure coco allows very precise control of irrigation and nutrient supply but requires consistent pH, EC, and watering management. It is not a passive soil medium and should be managed accordingly.
View product
8. pH, EC, and nutrients
A measuring device is only as reliable as its calibration, storage, and maintenance. In soil, a well-balanced system may require less routine measurement. In coco and hydroponic systems, reliable pH and EC monitoring become part of basic process control. Start with a straightforward base nutrient program and avoid adding several boosters at once before you understand how the plants respond.
Common misinterpretations are explained in our article about cannabis nutrient problems. If you prefer working from a defined feeding plan, see our guide to feeding schedules.

pH Perfect Sensi Grow A & B
A two-part vegetative base nutrient provides a clearer foundation than a collection of uncoordinated additives. Always adapt dosage to the growing medium, water quality, and plant condition.
View product
9. Choosing starting material that suits the setup
Genetics influence plant height, stretch, and timing, but they do not replace suitable equipment. In a low grow tent, manageable plant structure can matter more than a maximum catalog figure. Photoperiod varieties allow more flexibility in vegetative duration, while autoflowers follow a tighter genetically determined timeline.

White Widow Fem by Green House Seeds
A feminized photoperiod option for growers who want to control the vegetative period and flowering transition themselves. Plant count, purchase, and cultivation should always be checked against local law.
View product

Frosted Guava Auto by Green House Seeds
An autoflower option with a more genetically fixed development timeline. Errors during germination, watering, or early stress provide less timing flexibility for recovery.
View product
The differences between these two starting approaches are covered in The Revolution of Autoflower Genetics and our guide to successfully germinating cannabis seeds.
10. Three sensible budget levels
Basic setup
A basic setup prioritizes safe lighting, functional exhaust ventilation, and simple monitoring. Comfort, automation, and noise reduction remain more limited. Do not spend money on boosters before you have a suitable timer, circulation, thermo-hygrometer, and safe electrical supply.
Balanced setup
This level combines a dimmable LED, adjustable exhaust ventilation, a better filter, and reliable measuring equipment. For many users, it offers the best balance between control, noise, energy use, and future expandability.
Expandable setup
More performance headroom, climate control, and higher-quality sensors make the system more flexible. Automation becomes truly useful only when you understand which values should be controlled and where sensors should be positioned.
11. Three concrete budget examples
The following examples show how an overall budget might be distributed. They are not shopping carts and do not represent guaranteed prices. The relationship between components matters most: an expensive light cannot compensate for inadequate ventilation, and a premium tent cannot replace proper measurement.
Scroll horizontally to view the table
| Item |
60 × 60 cm basic |
80 × 80 cm balanced |
100 × 100 cm expandable |
| Tent |
€80 |
€120 |
€180 |
| LED |
€150 |
€280 |
€480 |
| Exhaust and filter |
€120 |
€190 |
€300 |
| Circulation and control |
€45 |
€80 |
€130 |
| Pots, medium, basic accessories |
€80 |
€130 |
€200 |
| Example total |
€475 |
€800 |
€1,290 |
In a 60 × 60 cm system, there is little room for oversized equipment. Compact components and good access are more important than maximum power. An 80 × 80 cm system offers a sensible middle ground for many beginners. At 100 × 100 cm, the requirements increase not only for lighting, but also for exhaust ventilation, filtration, mounting, and working space.
Keep a budget reserve
Keep roughly 10–20% of the purchase budget available for missing adapters, duct clamps, saucers, calibration fluids, spare parts, or an additional circulation fan. Spending the entire budget immediately can make small but necessary corrections unnecessarily difficult.
12. Buying used equipment: sensible or risky?
A used grow tent or solid metal accessory can reduce costs if the material, zippers, coating, and cleanliness can be checked. With used activated carbon filters, however, remaining capacity is difficult to assess. Electrical equipment should only be accepted when its history is reasonably clear and cables and connectors are undamaged.
Inspect used equipment for pests, spores, sticky residues, corrosion, and damaged electrical parts. Cleaning or disinfection does not replace an electrical safety inspection. When the condition is unknown, new timers, connectors, filters, and other safety-critical components are usually the more cautious choice.
Where you should not cut costs
Electrical safety, secure mounting, correctly sized exhaust ventilation, and a functioning activated carbon filter are not decorative extras. Use suitable components, avoid overloaded power strips, and keep electrical connections away from water, drainage runoff, and wet floors.
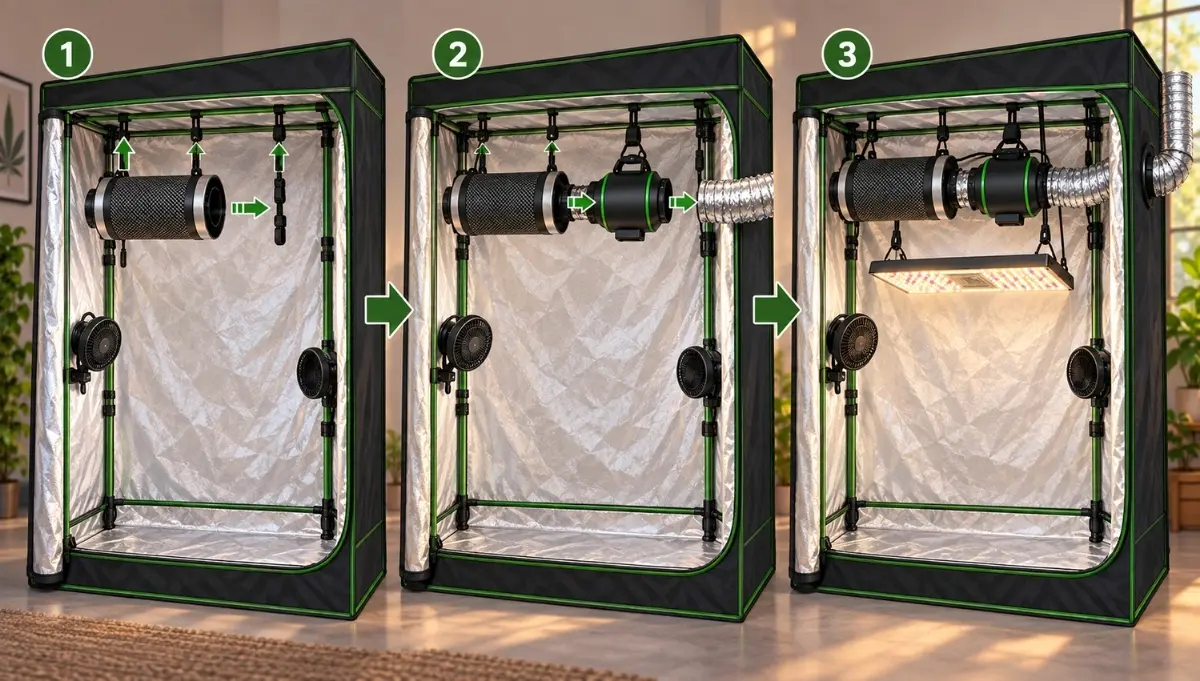
13. Building the setup in the right order
- Measure the location and check the electrical supply.
- Assemble the tent and inspect all poles, connections, and zippers.
- Mount the filter, exhaust fan, and duct securely.
- Install the LED using suitable, secure mounting points.
- Position circulation fans so that no individual plant area receives constant strong airflow.
- Place the climate sensor at the relevant plant height and not directly in the airflow.
- Test the empty system through at least one complete light and dark cycle.
- Record temperature, humidity, noise, negative pressure, and light distribution.
- Only then add plants, pots, and watering equipment.
14. Common mistakes with a first grow tent setup
- Looking only at lamp wattage instead of the area actually illuminated.
- Sizing exhaust airflow without accounting for the filter, ducting, bends, and real system resistance.
- Putting too many plants and large pots into a small tent.
- Buying humidifiers, dehumidifiers, or heaters before measuring the actual climate.
- Ignoring the electricity consumption of secondary equipment.
- Introducing several nutrient additives at once and then being unable to identify what caused a plant response.
- Leaving too little room for watering, inspection, cleaning, and maintenance.
- Starting immediately with plants without testing the empty system first.
Many of these issues are also covered in our guide to the 10 most common cannabis growing mistakes. For difficult-to-identify plant problems, the Cannabis Stress Guide can also help.
15. Shopping checklist
Core equipment
- grow tent in a previously measured size
- suitable dimmable LED and secure mounting
- exhaust fan, activated carbon filter, and compatible ducting
- at least one circulation fan
- suitable timer or controller
- thermo-hygrometer
- pots, saucers, and suitable growing medium
- watering container and basic cleaning equipment
Depending on the system and your needs
- pH and EC meters with calibration and storage solutions
- humidifier, dehumidifier, or heating
- silencer or vibration-isolated mounting
- automated irrigation
- additional sensors or climate control
- spare timer and suitable safety accessories
Conclusion
A good grow tent setup is not the longest possible shopping list; it is a balanced system whose components work together. Start with the available space and location, then size the lighting and exhaust system, and buy climate-control equipment only after measuring the real conditions. In addition to the purchase price, budget for electricity, filter replacement, growing media, consumables, and calibration fluids.
For beginners, a smaller and well-controlled system is usually more valuable than a large tent with weak ventilation, uneven lighting, and no measurement. Performance reserve is useful when it remains dimmable, adjustable, and compatible with the rest of the system.
Legal and safety notice from Grow Island
This article is provided solely for general information and educational purposes. It does not constitute legal advice and does not encourage unlawful activity. Laws regarding cannabis, hemp plants, seeds, cuttings, cultivation, and possession vary by jurisdiction and may change over time. Readers are responsible for checking and complying with the laws, age restrictions, and other regulations that apply where they live.
Electrical equipment, heavy filters, fans, and lighting must be installed securely, kept dry, and used according to manufacturer instructions. Electrical outlets, power strips, and timers must not be overloaded. If you are unsure about electrical installation, circuit capacity, or structural modifications, consult a suitably qualified professional.
Cost ranges, performance classes, and electricity-use examples are non-binding estimates. Actual prices, electricity tariffs, consumption, and results may differ. Product references may have a commercial purpose and may link to Grow Island offers. Current availability, technical specifications, and prices are determined by the relevant product pages. Statutory consumer rights remain unaffected.









Comments