Three Simple Steps to Master Everything You Need to Know About Cannabis Seedlings
Cannabis seedlings are not easy to keep alive, especially for beginner growers. However, with a thorough understanding of seedlings and their needs, this critical growing phase becomes much less intimidating. Below, in three simple steps, we show you how to grow healthy cannabis seedlings – from choosing seeds and germination to caring for young plants.
Step 1: Selecting the Right Genetics, Pot and Medium
Choose the right genetics: When acquiring seeds, consciously look for the ideal cannabis strain for you. Consider your growing experience and capabilities (tent size, care time), budget and available equipment, preferred flavor and effect and whether you want to grow indoors or outdoors. These factors will determine which genetics will yield the best results for you.
Choose a suitable growing medium: For starting, the best is a light soil with good water permeability and aeration, with a slightly acidic pH (6.2–6.5). It’s recommended to mix in 20–50% perlite to improve aeration and aid nutrient retention. The more nutrients you plan to give your plants, the more perlite you should mix into the soil for better drainage and to prevent nutrient buildup. Remember to water seedlings only at the stem base, and only when the soil is completely dry (overwatering and underwatering are discussed further below). Keep in mind that seedlings—especially autoflowering strains—are very sensitive to nutrients. Never plant seedlings in nutrient-rich, “hot” soil and avoid feeding them until they develop at least 3–4 sets of true leaves, about 1–2 weeks.
For autoflowering seeds – suitable pots
If you plant autoflowering seeds, it’s recommended to directly sow them into their final pots. Due to their short life cycle, it’s best to avoid unnecessary stress including transplanting. The appropriate pot size depends on strain and growing space size, but generally pots of 5–15 liters are used for autoflowers.

Feminized Seeds – Suitable Pots
For feminized (photoperiod) seeds, immediate final potting is less critical, as these plants have more time to recover from transplant stress. You can start with special germination trays or Easy Start pots for strong root development. Transplant every seedling before it outgrows its starter pot—generally when leaf diameter reaches the edge of the small pot, it’s time to move it to a bigger container. Most indoor growers transplant directly to around 12-liter pots at this stage, but pot size can be adapted to the strain and grow setup. Feminized photoperiod plants often benefit from multiple transplantings to larger pots to maximize development, not just from immediate large potting.
Note on Cannabis Pots
On the market, you can choose from cheap starter pots to advanced “smart” pots. While excellent cannabis can be grown in simple plastic pots, consider a few points when choosing:
- Drainage holes: Make sure there are enough holes at the bottom to allow free water flow. Standing water can cause root rot and fungal diseases. If your pot doesn’t have holes, you can drill some yourself.
- Aeration: The growing medium’s key role is ensuring oxygen access to roots. Fabric pots and other breathable, smart containers provide more oxygen to roots, enabling faster, stronger growth, healthier plants, and better yields.
- Pot size: Growing a tiny seedling in a pot that’s too large can easily cause overwatering. Underdeveloped roots cannot absorb all water held in a huge soil volume, resulting in stagnant moisture that suffocates roots and attracts pathogens and pests to soil and grow room.

Step 2: Use Proper Germination Technique
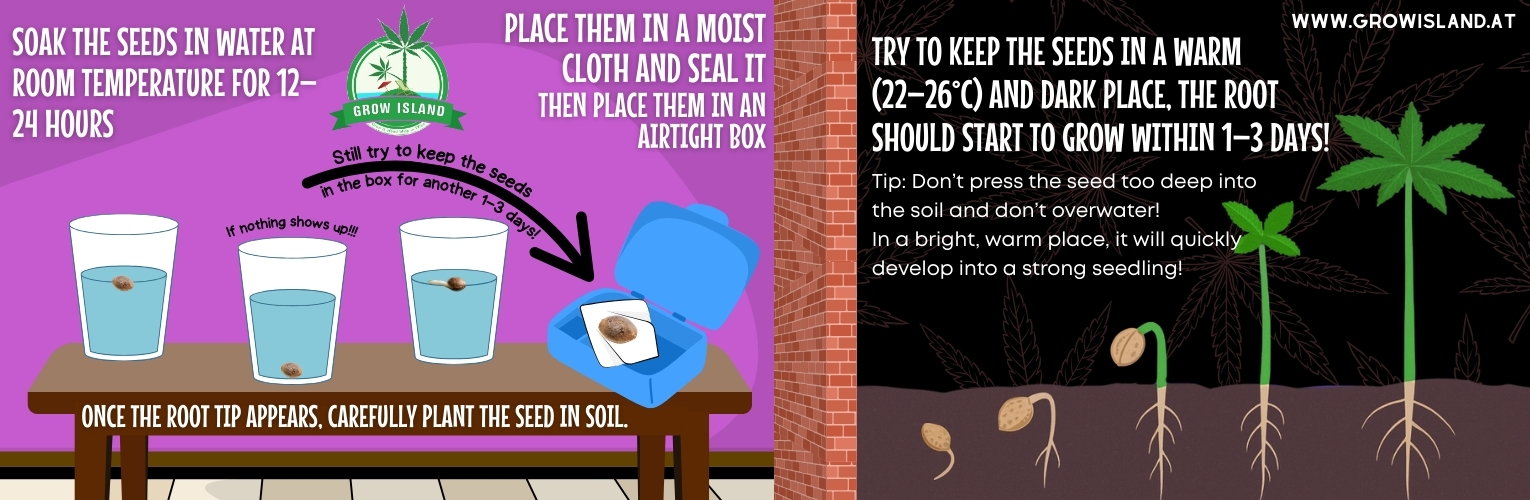
Four things are needed for cannabis seed germination: moisture, warmth, darkness, and time. For success, choose one of the proven germination methods below to ensure healthy seedling starts.
Paper Towel Method
Place the cannabis seed between two moist paper towels, then put this package in a covered plastic container or storage box. Keep the container in a warm, dark place – the ideal temperature is 20–25°C. Leave a small gap in the lid for ventilation to allow fresh air in.
Water Glass Method
Simply drop the seed into a glass of water and leave it at 20–25°C for 24–48 hours (e.g., inside a cupboard). When you see the tiny white root emerging, the seed is ready for planting. If the seed has not cracked within 48 hours in water, proceed with the paper towel method. Be careful not to leave seeds in water longer than 48 hours, as they may start to rot.
After the seed cracks and sends out its first root, plant it about a thumb’s depth (3–5 mm) into the soil, root downwards. This prevents the seedling from turning in the soil and allows it to grow straight upward.
Recommended Tools for Germination
- Romberg Lumio Propagator (with light): This small indoor propagator from Romberg is very stable and offers enough space for about 10 cuttings or 10 planted seeds to sprout. It has an adjustable vent on the transparent lid to control humidity. It also features built-in fluorescent lighting.
- Cultilene Rockwool Cubes (77 pcs): Rockwool propagation medium provides excellent conditions for seed germination and rooting young seedlings. Made of natural basalt (solidified lava), these sponge-like cubes have excellent water retention and good aeration, promoting fast and healthy root growth. The pack of 77 provides enough uniform cubes for larger seedling starts or year-round use and fits well in hydro systems.
- Jiffy 44 mm Peat Pellets (50 pcs): Made of natural peat and coconut fiber, Jiffy pellets are ideal for sowing seeds and raising seedlings. Their excellent water retention and sufficient aeration support rapid, healthy plant growth. The 44 mm pellets expand when soaked with water, making them very easy to use. Suitable for beginners and experienced gardeners alike, for indoor and outdoor use.
Step 3: Mastering the Seedling Phase
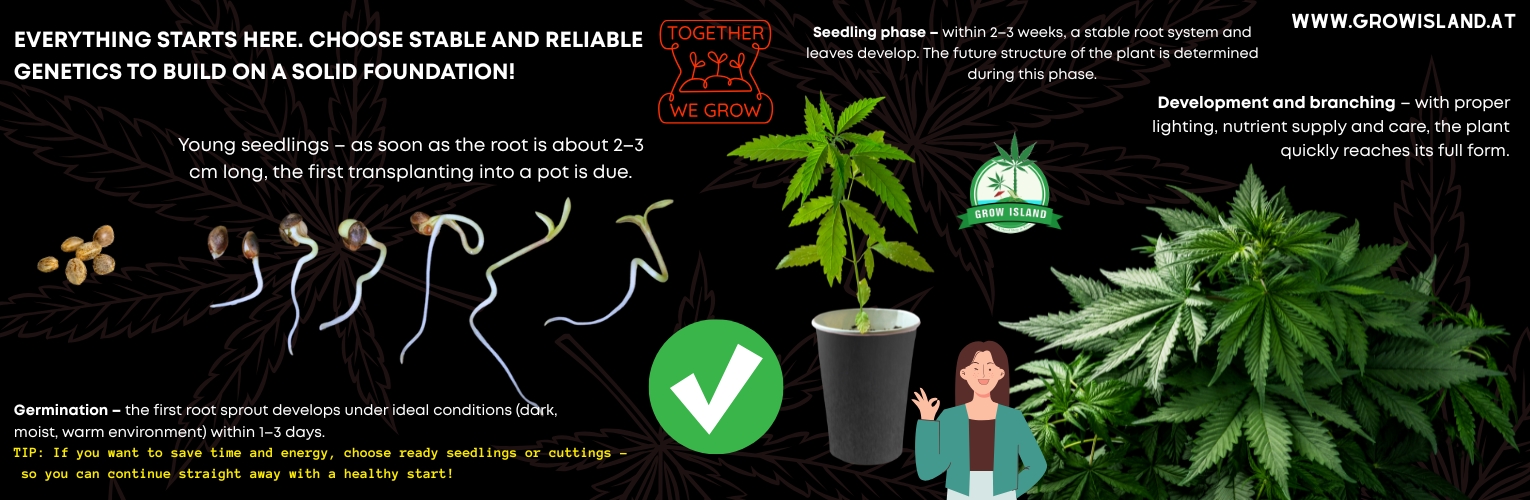
Now that the germinated seeds are in soil, the real challenge begins. Cannabis seedlings are incredibly fragile: they have just a few weak roots and tiny cotyledons, so even a little stress can kill them within hours. Taking time to learn your seedlings’ specific needs helps you optimize their environment so they can grow into strong, viable plants in the vegetative phase.
Temperature
Cannabis seedlings prefer temperatures between 20–26°C during the day, and about 4–5°C cooler at night. High temperatures stress young seedlings and hinder growth, which can be fatal at this early stage. Curling, dry leaf edges are typical signs of heat stress. Over time, seedlings may show other symptoms such as pale or discolored foliage or reddish/purplish stems. Heat stress causes leaves to wilt and tip downward.
Conversely, too cold an environment can cause seedling cells to freeze, disrupting transport of nutrients, water, and oxygen. This halts growth and eventually kills the plant if unaddressed. Wilting foliage, slow growth, and weak, water-stressed stems indicate too low temperatures in the grow space or propagator. (Temperatures below 20°C at this stage slow growth for weeks and can affect flowering outcome; some genetics are more sensitive than humans.)
Humidity
Young seedlings, while their roots are underdeveloped, absorb water osmotically mainly through their leaves. To optimize this process, a high relative humidity – ideally around 65–70% – is crucial.
Humidity under ~20% strongly hinders seedling development and causes deficiency-like symptoms (e.g., yellowing or spotted leaves). Humidity above 70% causes wet spots on leaves, leading to wilting or rot, and attracts fungi, pathogens, and pests. As seedlings enter the vegetative phase, gradually reduce humidity to ~50% to avoid fungal and other problems.
Lighting
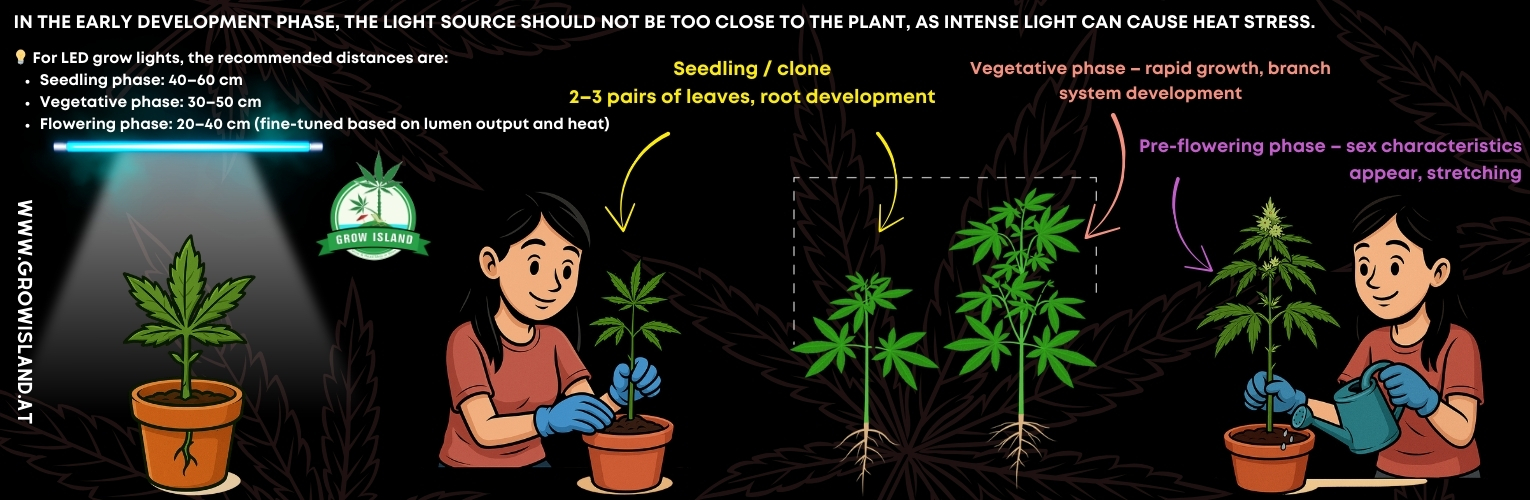
Healthy cannabis seedlings under properly spaced lamps.
Excessive light can burn seedling leaves while insufficient light causes stretching. Seedlings are sensitive to intense light; under strong HID or LED lamps, they may get burnt. As with mature plants, this is indicated by scorched, deformed leaves – a sign of light stress. Conversely, lack of sufficient light leads to stretching, thin, weak stems, and plants that easily topple.
For best results, grow seedlings under blue-spectrum CFL bulbs on an 18/6 light cycle for the first 10–14 days. Once real healthy leaves and 2–3 stem nodes develop, seedlings can move under stronger HID or LED lamps to start vegetative growth.
Outdoor Seedling Cultivation
As an outdoor grower, you obviously can’t instantly control temperature or humidity. If you want to get through the seedling phase outdoors, you have three options:
- Indoor start: Keep seedlings indoors under a CFL lamp for the first ~2–3 weeks to protect them from weather.
- Outside during day, inside at night: If daytime temps stay 20–25°C, place seedlings outside during the day, then bring them in at night to protect from cold, wind, or rain.
- Outdoor propagator/greenhouse: Place seedlings in protected outdoor environments like a propagator, greenhouse, or polytunnel. This shelters them from weather and helps maintain humidity and temperature.
Tips for Changing Light Sources:
1. Gradual Transition:
If possible, don’t switch abruptly to a very different light source (e.g., from weak CFL to strong LED). If needed, start with the lamp positioned far from the plant and slowly move it closer over several days.
2. Maintain Proper Distance:
Seedlings are sensitive; always keep lamp distance at a level that avoids excessively intense light and burning.
- CFL lamps: 10–25 cm
- LED lamps: 30–50 cm
- HID lamps (MH or HPS): 45–60 cm
3. Consider Light Spectrum:
Blue-spectrum light sources are ideal for seedling development. Switching to other spectra (e.g., red spectrum for flowering) should be slow and gradual for plant adaptation.
4. Maintain Light Cycle:
Keep the previous light cycle (e.g., 18/6) during transition to minimize stress.
5. Watch for Stress Signs:
Monitor seedlings for stress signs (leaf burn, downward curling). Move lamp away if observed.
Example of safe light transition for seedlings:
- Day 1: Set new light source ~50 cm from seedlings.
- Day 2: Move closer to ~40 cm if no stress signs.
- Days 3–4: Adjust to ideal distance (~25–30 cm for LED, 15–20 cm for CFL).
Following these precautions minimizes plant stress and allows successful light source changes.
How to Water Cannabis Seedlings?
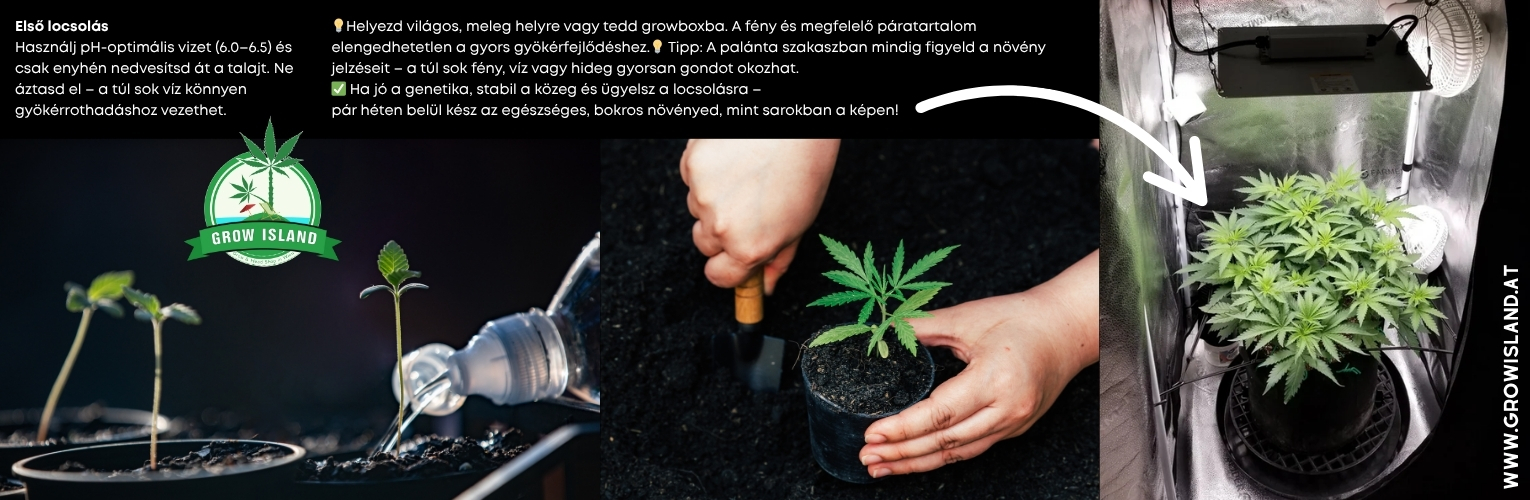
How often to water cannabis seedlings depends on many factors. Best to plant seeds in high-quality, loose, airy growing medium from the start. Always use pots with good drainage – for example, fabric pots or Air-Pots – and if possible, use CFL lamps with moderate heat (lamp ~25–45 cm above pot rim).
Types of lamps used, pot size, exact soil composition, growing environment temperature and humidity all affect watering frequency. Don’t worry if you’re unsure at first: learning when and how much water a young plant needs takes practice and experience.
Best method: Cannabis seedlings prefer warm, humid (but not overly wet) conditions. In early days, without roots, they mainly absorb moisture through leaves. Therefore, regularly humidify seedlings – spray water mist 3–6 times daily depending on ambient temperature. Use special devices like Intelligent Humidifier, 8l if available.
It’s also advisable to place a clear plastic dome or bag over seedlings the first few days to maintain high humidity and help young plants absorb water through cotyledons and first true leaves.
Never water seedlings directly at the stem. Instead, water soil around the plant about 3 cm from stem in a circular pattern. This encourages roots to grow out toward water, forming a healthier root system while avoiding excess moisture at the stem base, which fosters Pythium, Botrytis, and Fusarium fungi causing root rot.
When to water: Rule of thumb is to water only when soil is dry. Check by inserting your finger about 2 cm into the soil; if dry, it’s time to water. Later, with experience, you can estimate by pot weight: lift the pot after watering and remember its weight, then compare when dry – when significantly lighter, water again. Ideally water early morning or just before lights on to let plants absorb water during “day” while excess moisture evaporates, preventing stagnant wet soil and pathogen growth.
Frequency: Water seedlings when dry, usually every 3–7 days depending on:
- Soil composition and water retention.
- Ambient temperature and relative humidity.
- Lighting type (CFL and LEDs emit less heat, MH/HID lamps produce more, drying soil faster).
- Pot size.
- Amount of water given at a time.
Water amount: There is no one-size-fits-all rule as it depends largely on pot size. Generally, 1–2 cups (approx. 200–500 ml) per watering is sufficient for a seedling.
Preventing Root Rot
Almost every grower encounters seedlings suddenly falling over and dying within 24 hours, despite looking healthy. This damping-off or root rot is caused by soil-dwelling fungi—most commonly Pythium, Botrytis, and Fusarium. These pathogens can be present undetected for long periods but multiply rapidly in overly moist conditions, attacking roots and killing the plant. The most common causes are overwatering and prolonged high humidity.
Unfortunately, once seedlings show first root rot signs (limp, thinning, browning stem), little can be done to save them. Best to immediately remove affected seedlings from grow space or propagator to prevent spread.
To prevent, monitor grow space temperature and humidity, avoid overwatering, ensure soil and pots have good drainage (see drainage holes importance above). Always use fresh soil mix for seedlings (recommended for beginners: Lightmix which fits well with Bio Bizz nutrient kits), or sterilize used soil by baking it at around 220°C.
Avoiding Nutrient Problems
Healthy cannabis plants show vibrant green foliage that indicates adequate nutrients. Any discoloration on seedling leaves or stems may signal nutrient stress.
Remember, seeds contain enough nutrients for the seedlings’ first few weeks or days. After reserves deplete, plants need external nutrients for further growth and flowering.
- Seedling fertilization: Young seedlings are very sensitive – too nutrient-rich soil or early fertilization can easily “burn” them. Generally, feeding seedlings is not recommended. Let seedlings grow in a slightly nutrient-poor medium (e.g., special starter trays or light potting soil) until ready for transplanting and vegetative phase start. Typically, 1–2 weeks after germination seedlings are ready, but this may vary by strain. Severe undernourishment signs can appear by 2–3 weeks if energy reserves run out.
Watch the plant’s condition instead: transplant and begin vegetative growth when at least 3 stem nodes and 4–5 sets of true leaves have developed.
- Transition to vegetative stage: After transplanting to final (or larger) pot, allow 3–7 days for adjustment. Transplanting stresses plants and roots need time to recover. Starting fertilization too early after transplant can overload roots, causing nutrient buildup or block. Once the plant has recovered, begin mild feeding with appropriate NPK ratio (example 4:2:3) and correct pH for newly vegetative cannabis seedlings.
- Nutrient burn: Growers commonly encounter this when they fertilize too early or at too high doses—usually late seedling or early vegetative stage (e.g., transplanting into “hot,” rich soil or starting with concentrated nutrients). Early signs include very dark green leaves with burnt, dried tips. If untreated, leaves may curl up like spoons. Fortunately, unlike many seedling issues, nutrient burn is treatable. Stop feeding for at least a week and water with pure neutral pH water. When new shoots look healthy and fresh green, resume feeding gradually at half the recommended dosage to allow adjustment.
- Organic cultivation: We advocate natural, organic cannabis gardening. No synthetic fertilizer matches the benefits of living soil microorganisms. Organic growing focuses on building a living soil rather than adding chemicals weekly to inert media. Though the latter is faster and more convenient, the flavor of organically grown cannabis is hard to beat. Know that organically grown plants often yield less than those fed conventional nutrients.
Pest Control
Pests and other insects can destroy young seedlings in a single day. Prevention requires keeping the seedling environment clean and providing optimal temperature and humidity. Avoid overwatering (standing water attracts pests) and learn about common cannabis pests to recognize and stop infestations early.
Common pests to watch for:
- Fungus gnats: Tiny black fly-like insects that lay eggs in moist soil. Their larvae chew roots, damaging seedlings.
- Spider mites: Tiny red or black mites living under leaves, weaving fine webs over foliage. They prefer hot, dry environments and suck plant fluids, leaving yellow spotted leaves.
- Long-horned green moth flies: Small, delicate winged insects that chew irregular snail-trail-like marks on healthy leaves. Their damage appears as poor quality discoloration on leaves.
- Powdery mildew: As its name suggests, a fungal disease forming a white, powdery coating on leaf surfaces. Spreads quickly and weakens plants.
- Pythium and Fusarium: Soilborne fungi that are hard to detect until damage occurs. Early signs include whitish mold patches on soil surface indicating infection.
Cannabis seedlings like warmth and humidity—but pests and pathogens love these conditions too. The best defense is prevention: keep your garden spotless and grow seedlings in a closed propagator or tent if possible. This greatly reduces the chance of unwanted pests or diseases.
Extra tip: Use yellow sticky insect traps!
These bright yellow sticky sheets attract flying pests—especially fungus gnats, moth flies, and aphids—and effectively reduce infestation chances early on. Simply place them near seedlings or hang them above plants.
C hemical-free, passive control
Excellent for early detection
Suitable for indoor and outdoor use
Highly recommended during germination and seedling phases when plants are especially vulnerable to pests.
Preventing Leggy Seedlings or Stretching
Seedlings stretch toward light. If the lamp is too far or light insufficient, stems grow long and thin, unable to support the plant. To prevent this, ensure proper lighting and distance: use blue-spectrum CFL lights placed about 5–10 cm above seedling tops. Also, do not keep freshly sprouted seedlings in darkness for long (some forums mistakenly advise total darkness after germination’s first day) – lack of light causes abnormal stretching.
Seedling Transplanting (When and How)
Transplanting seedlings is not an exact science and cannot follow a strict schedule. Instead, observe your plants and decide based on their signs. A general rule is to transplant when leaves cover the pot rim fully.
Usually, you can check roots within one to two weeks after germination. If carefully lifting the seedling by the stem allows pulling out the entire soil ball intact, the plant is ready to transplant.
Be very gentle during transplanting. Any minor root damage causes great stress to the plant and regeneration at this stage can take a long time.
Germination and Seedling Development Process
Inside the dark, hard seed coat, the cannabis seed contains all necessary genetic information and nutrients to sprout and develop into a large, vigorous plant. In warm, humid environments, the seed absorbs water – a process called imbibition that triggers growth.
As water reaches inside the seed, special enzymes activate, causing the seed to send out its first root sprout. This small white primary root pushes downward to find water while the upper seed coat initiates a shoot upward toward light.
The seed contains two small cotyledons (embryonic leaves) that unfold and shed the seed coat as they emerge above soil. After cotyledons appear, the plant develops its first true leaves—initially only single “fingers.”
In early life, cannabis seedlings draw all energy from seed reserves. As roots grow and leaves develop, the plant increasingly absorbs water and nutrients from soil and relies more on photosynthesis. Once it produces several true leaf sets (usually 5–7 fingers per leaf), it is no longer a seedling and officially enters the vegetative growth stage.
Remember: fast growth and vibrant green foliage are hallmarks of a healthy seedling!
Grow Smart, Shop with Us, and Get Help with Details!
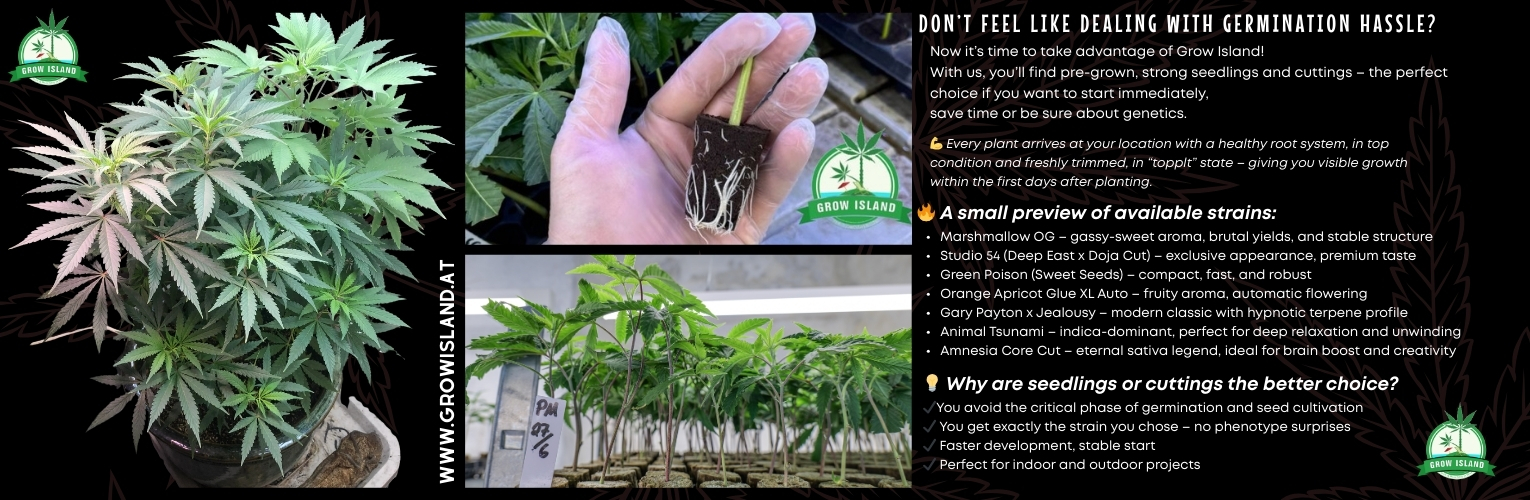
Now that you have mastered the theoretical basics for healthy cannabis seedling cultivation, it’s time to apply them in practice if you have the opportunity. For the best, most reliable results, it’s worth investing in a quality starter kit and reading more tips on our blog.
Contact:
Website: www.growisland.at
Personal consultation: Vienna, Austria
Social media: Facebook, Instagram
Written by: Bartholomew Alen
Last updated: August 5, 2025.


Comments